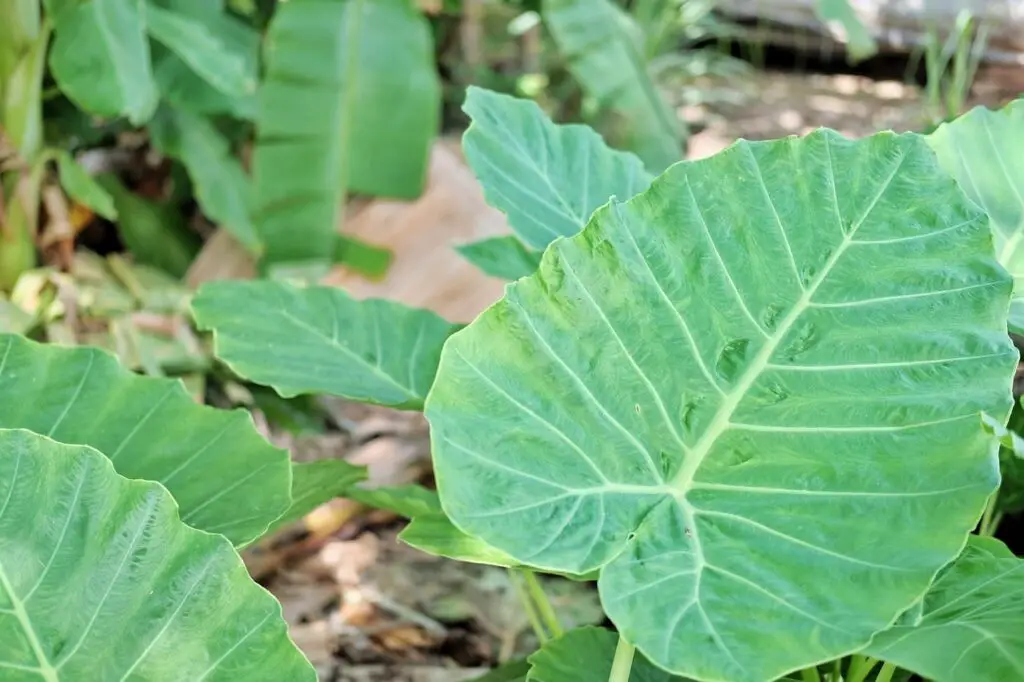
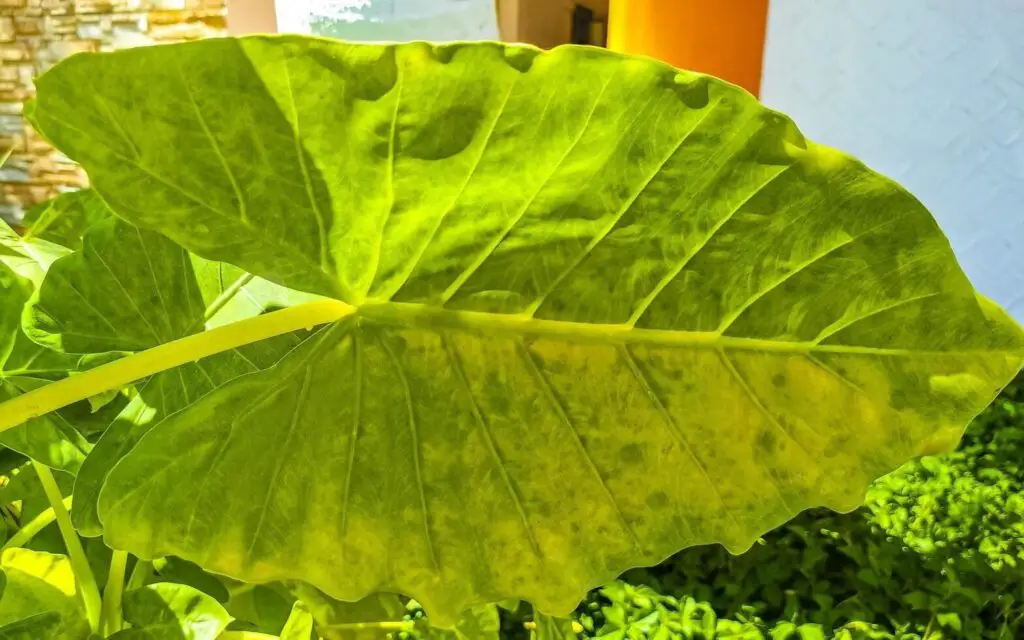
The elephant ear plant is known as Alocasia odora. It has large, arrow-shaped leaves that look like elephant ears. This makes it popular as a houseplant and garden centerpiece. Its lush green leaves give a tropical feel. Gardeners and designers both love using this plant.
In this guide, we look at how to grow elephant ear plants from cuttings. These plants are already popular for their looks and easy care. Learning to grow them from cuttings lets you have more of these plants. We’ll explore the easy and rewarding process of propagating elephant ear plants. This will help you create thriving plant areas in your home or garden.
How to Propagate Elephant Ear Plant?
Learning how to propagating elephant ear plants is important for expanding your plant collection. Propagation means reproducing plants in different ways. This lets gardeners grow more of their favorite plants and have more greenery around them.
Propagating elephant ear plants is a great way to grow your indoor or outdoor garden. You can easily make more plants. This is fun and you can give the new plants to other people who love plants.
There are different ways to grow new elephant ear plants. You can use stem cuttings, plant seeds, or divide the roots. Each method has its own benefits and things to consider. In this guide, we’ll look at these options in detail. This will help you successfully grow more elephant ear plants for your garden.
Propagation Methods
When it comes to growing elephant ear plants, there are a few ways to do it. Each method has its benefits and drawbacks. Let’s look at these methods in more detail:
Stem Cuttings
While stem cuttings are a common way to grow many plants, they are usually not the best choice for elephant ear plants. This is because elephant ear plants have large leaves and it takes a long time for their stems to grow roots. This makes stem cuttings less practical and efficient compared to other methods.
Germinating Seeds
Another way to propagate elephant ear plants is by germination, which provides an opportunity to create new specimens from the ground up. The steps for germination of seeds are as follows:
- Gather fresh seeds from healthy elephant ear plants. Make sure the seeds are clean and free of debris.
- Ensuring the Best Seed Conditions: Make sure the seeds have the perfect environment to grow. This means keeping the temperature between 68-85°F and the air warm and humid.
- Plant the seeds in potting mix that drains well. Lightly cover the seeds with soil. Keep the soil moist but not too wet.
- Seedling transplantation: After the seedlings grow their first two sets of leaves, gently place each one in a pot filled with the right potting mix. As they get older, make sure to give them proper care.
Root Division
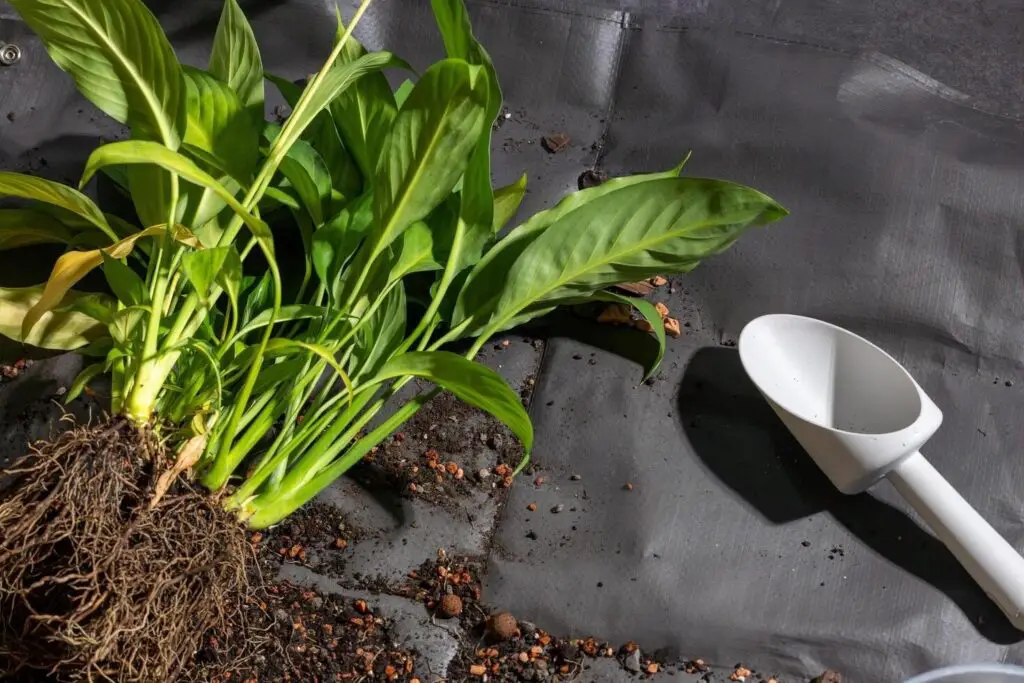
One of the most practical and dependable ways to propagate elephant ear plants is by root division. This is a thorough tutorial on dividing tubers made from elephant ears:
- Gather large, clean pots with drainage holes. Use a rich potting mix made of 50% coco coir and 50% peat moss. Have a sharp, clean knife or garden spade ready to divide the tubers.
- Gently remove the plant from the soil. If the plant is in a pot, carefully loosen it. If the plant is in the garden, dig around it to avoid damaging the roots. Use a shovel to create a trench around the plant and lift the entire crown from the soil.
- Dividing plants can be helpful. Inspect the root ball to find sections for division. Look for smaller root systems or separate pups around the main crown.
- Gently pull away the smaller root systems to separate the tubers. Use a knife or spade if needed. Make sure each tuber has a strong root system attached.
- Repotting plants is important. First, plant the main crown in a new pot or back in the ground. Then, pot up the separated tubers using moist potting mix. Provide good care for each division as they start to grow.
Step-by-Step Guide for How To Propagate Elephant Ear Plant
Elephant ear plant propagation is a fascinating effort that requires careful planning and execution before beginning. To ensure effective propagation, adhere to this step-by-step guide:
Equipment Necessary
Get the tools you’ll need to help the propagation process started before you start. What you’ll need is
- With drainage holes for every tuber division, large, spotless pots
- Rich potting mix, best made with a 50:50 blend of coco coir and peat moss
- For splitting the tubers, use a sturdy, sharp knife or garden spade.
Remove Plant Crown From Soil
The first step is to carefully take out the plant crown from the soil. If the plant is in a pot, gently loosen it from the pot. Be careful not to damage the roots. For plants in the garden, dig around the plant. Make a trench to guide the shovel under the roots. Once the whole crown is free, lift it from the soil as one big mass of roots and tubers.
Deciding Where To Divide
Inspect the root ball. Look for smaller root systems or separate pups around the main crown. If no pups, find the original tuber and smaller roots branching off from it.
Separating New Tubers From Parent Plant
Inspect the root ball. Look for smaller root systems or separate pups around the main crown. If no pups, find the original tuber and smaller roots branching off from it.
Cutting Off Tubers From Mother Plant
Gently remove some of the smaller root systems to start separating the tubers. Use a sharp knife or garden spade to cut the tubers. Make sure each tuber has a strong root system attached. Be careful not to damage the parent plant when doing this.
Repotting
The tubers need to be repotted after being divided. Pot up the divided tubers with wet potting mix. Plant the main crown in a fresh pot or back in the ground. Place each tuber firmly in its container. Ensure the soil mixture covers the roots.
Best Time for How To Propagate Elephant Ear Plant and Care Tips
For elephant ear plants to be successfully propagated and to maintain their health and vitality, timing is essential. Here’s a guide to critical care instructions to maintain your plants healthy and the ideal times for propagation:
Ideal Timing for Propagation
The best time to grow elephant ear plants is in spring or early summer. This is when the plants are actively growing, making it easier for them to recover after being divided. Don’t try to grow them in winter or when they are resting, as this can slow down their root growth and overall development.
Tips for Caring for Elephant Ear Plants
Proper care is very important for elephant ear plants to stay healthy and strong, especially when you are growing new plants from them. Here are some key tips to care for these plants:
- Elephant ear plants need consistently moist soil. But don’t let them get waterlogged. Water them thoroughly after propagation. Keep the soil moist all season. Reduce watering in winter when the plant rests.
- Elephant ear plants need bright, indirect sunlight or partial shade. Don’t put them in direct sunlight, as this can burn their leaves. Indoor plants should be near a window with filtered sunlight. Outdoor plants need shade.
- Temperature is important for elephant ear plants. They like it warm and humid, above 70°F. Avoid cold drafts or temperatures below 50°F. This can stress and harm the plant.
- Fertilize your elephant ear plants during the growing season. Use a balanced fertilizer. Follow the directions on the package. Apply the fertilizer every 4 to 6 weeks. This will help your plants grow healthy.
Storing Elephant Ear Tubers Over Winter
As the cold months arrive, it’s important to take steps to keep your elephant ear plants safe during winter. Follow these tips to store the elephant ear tubers over the cold season.
Getting Ready for Dormancy: Your elephant ear plants should be ready for dormancy when the first frost comes and the weather gets colder. Start by trimming the leaves until only a few inches of the stem show above the ground.
Digging Up the Tubers: Carefully take the tubers out of the ground. Use a shovel or fork to gently remove the soil around the tubers before lifting them from the ground.
Cleaning and Drying: Gently brush off any extra dirt and debris after removing the tubers from the soil. Let them air dry for a few days in a well-ventilated place until the earth is completely dry.
FAQS
Q: How do I know if my elephant ear plant is ready to be divided?
A natural divide in the root ball could be smaller root systems or distinct pups. Look for these kinds of divisions. Both division and successful dissemination are guaranteed in these regions. It could be time to divide the plant if it has outgrown its pot or the available garden area.
You may be interested in reading How To Propagate Majesty Palm | Ravenea rivularis
Citation
RHS – Air layering