Ever thought about how those tasty prunes in your go-to recipes or snacks are prepared? Well, wonder no more! In this guide, we’ll explore how to dry plums at home to make prunes. This is a great way to savor tasty prune flavor and enjoy the benefits of homemade goodness.
When you create prunes at home, you’re not just making a delicious snack. You’re also saving money and taking charge of what goes into them. Get ready for a simple and clear trip as we learn how to turn plums into delicious prunes right in front of you. Now let’s get started and learn how to dry plums to make prunes!
Selecting the Right Plums
Picking plums that are just right is the key first step for making tasty prunes. The plums’ quality and ripeness will really affect how good your dried fruit turns out. Here’s why choosing ripe plums matters so much:
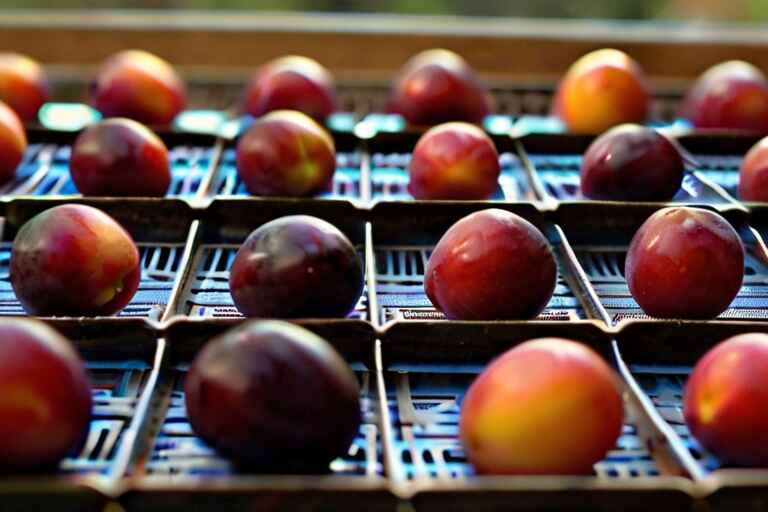
Importance of Ripe Plums
Ripe plums taste sweeter and contain more sugar than unripe ones. During drying, plums get sweeter, making flavorful prunes. Ripe plums are very sweet and have lots of sugar. As they dry, they become prunes with rich flavor. Fully ripe plums are juicy and make plump, succulent prunes.
Characteristics of Ideal Plums
Look for plums that are firm to the touch but somewhat soft when choosing them for drying. This means they are mature and prepared for desiccation. Ripe plums should have a bright color and a sweet smell, showing they are fresh and tasty. Avoid plums that are too soft, damaged, or have marks, as they might not dry well or could get moldy during drying.
Tips for Sourcing High-Quality Plums
When choosing plums for your prunes, keep the following in mind when you source them:
Visit local farmers’ markets where you can find freshly harvested plums. Local farmers’ markets offer freshly harvested plums. Look for plums in season, from late spring to early autumn, as they taste best then. When buying from a store, choose firm, plump plums without wrinkles or soft spots. Ask the store manager for advice on choosing plums to dry. If possible, go for organic plums grown without chemicals for a tastier fruit.
Preparing the Plums to Make Prunes
Before we start turning plums into yummy prunes, we must get our plums ready the right way. This step sets the foundation for successful drying and ensures the best results.
Thoroughly Washing the Plums
We need to wash our plums thoroughly first. This helps to get rid of any dirt, debris, or chemicals that might be on the surface. Put the plums in a colander and wash them under running water. Gently rub with your fingers for a good clean. If you prefer, you can use a produce wash solution for added cleanliness.
Pitting the Plums
The pits need to be taken out once our plums are cleaned. Pitting plums can be done in two typical ways: with a knife or with a pitter instrument. If you use a knife, slice the plum in half along the natural line. Gently twist the halves and remove the pit with the knife’s tip. Using a pitter tool is faster and better for the fruit because it helps avoid damage.
Making Sure All Sizes Are Equal
When it comes to drying plums, consistency is essential. When plums of the same size dry evenly, they become prunes with a consistent texture and flavor. Sort your plums by size and form, taking your time to choose ones that are comparable. This labor creates perfectly dried prunes, achieved with careful inspection.
Options for Drying
Now that we’ve cleaned and removed the pits from the plums, they are ready to turn into prunes. Let’s look at different ways to dry them. You can pick from different ways to dry the plums based on what you like, what you have, and how much time you have. Each method has its advantages and disadvantages.
Sun Drying
One of the oldest methods for drying fruits, including plums, is probably sun-drying. To dry plums, you put them in the sun on trays or screens. They dry naturally over a few days.
Positive Impact: Dry Plums to Make Prunes
Sunlight is free, making this method budget-friendly. No power or fuel needed. Sun-drying lets plums keep their yummy natural taste.
Negative Impact: Dry Plums to Make Prunes
Sun-drying relies on sunny and dry weather. It takes time, ranging from days to weeks, based on the weather. Outdoor exposure can raise contamination chances.
Oven-Drying
You can dry plums faster by using your oven instead of the sun. Your oven’s heat helps dry the plums quickly.
Positive Impact: Dry Plums to Make Prunes
Oven-drying is faster than sun-drying, usually finishing in a day. The oven’s controlled temperature minimizes spoilage risk. Oven-drying is possible throughout the year, unlike sun-drying.
Negative Impact: Dry Plums to Make Prunes
Oven-drying uses electricity or gas, increasing energy expenses. Your oven’s size can restrict how many plums you dry at once. Be cautious to avoid plums drying out or burning.
Using a Food Dehydrator
Food dehydrators dry fruits like plums effectively. You can control the temperature and airflow precisely.
Positive Impact: Dry Plums to Make Prunes
Food dehydrators make sure fruits dry evenly. Dehydrators save energy and are user-friendly with simple controls.
Negative Impact: Dry Plums to Make Prunes
Buying a food dehydrator needs an upfront investment. Dehydrators, like ovens, can only handle a set amount per batch. When not in use, they require counter or storage space.
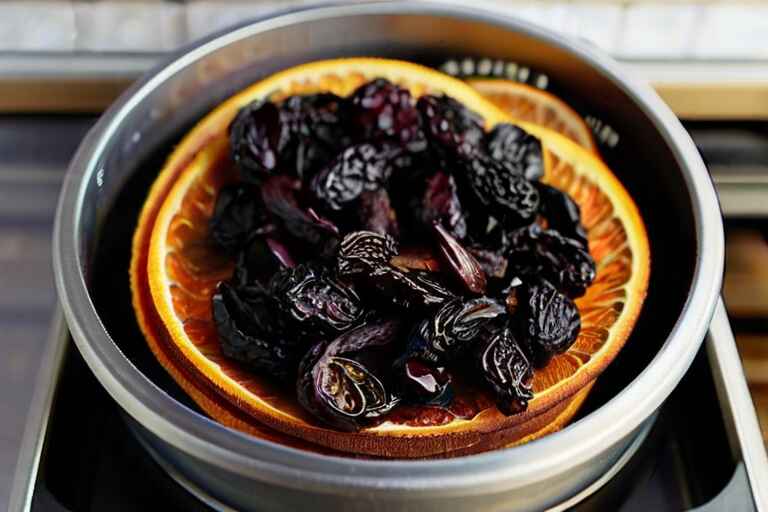
Keeping an Eye on and Testing for Dryness
Before dry plums to make prunes, it’s vital to know when they are dry enough. When dried correctly, plums have a wonderful taste and texture. They stay fresh for a long time without spoiling. Here’s how to make sure your plums get just the right amount of dry:
Signs of Proper Drying: As plums dry, they become leathery. This changes their texture. Properly dried plums get a leathery feel when chewed. Dried plums are lighter due to less moisture. They should not feel sticky or moist to the touch.
Methods of Testing: Take a dried plum and attempt to bend it gently. A well-dried plum should bend without breaking, showing it’s dry enough. Check the dried plums for how they look. Dry plums to make prunes should look the same in color and texture. There should be no wetness or stickiness. Wrinkles and shrinkage are typical for dried plums. Try a dried plum to check its taste and texture. It should be sweet, chewy, and bursting with natural plum flavor.
Importance of Thorough Drying: Drying completely is necessary to stop mold from growing and food from spoiling. If dry plums to make prunes aren’t completely dry, they can spoil. This could lead to mold and bacteria growth. Dry prunes last longer, so you can enjoy them without worry. Follow the drying instructions carefully to ensure dry plums to make prunes are fully dried. For best outcomes, it’s best to be cautious and extend the drying time if needed.
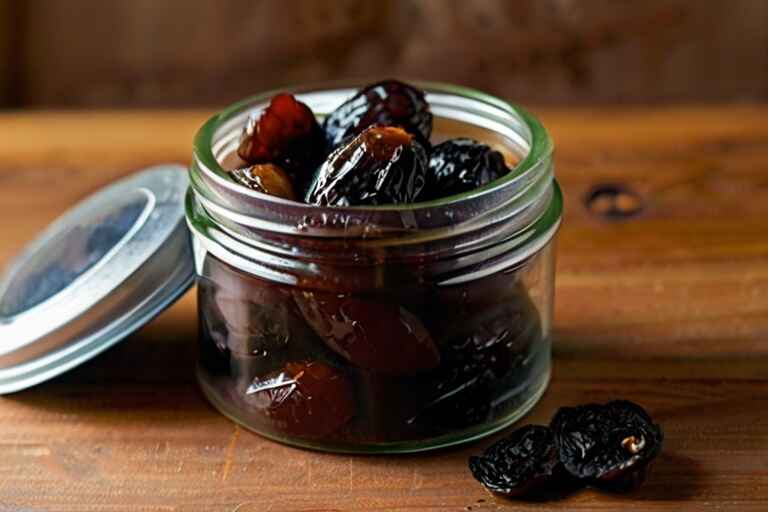
Storing Prunes: Preserving Your Dry Plums to Make Prunes"
Store dried plums in sealed bags or containers to keep them fresh. This prevents them from drying out and keeps them fresh. Store prunes in dark, cool places away from sunlight and heat sources. Prunes lose taste and texture easily if they touch heat and light. Date and mark containers to track freshness. By keeping your prunes in sealed containers or bags, you can make sure they stay fresh. Mark the containers with the date to maintain freshness. This way, you always enjoy your prunes at .
“Your blog has provided me with a wealth of priceless information! After searching the internet for a long time, I found exactly what I needed on your website. Your advice helped me learn and want to become a better gardener. Thank you for sharing your knowledge and making it easy for plant lovers like me. Keep up the fantastic work!” .
Thanks for your feedback